Digital thermometer temperature readings with a Raspberry Pi
You will need:
- Raspberry Pi (I was using Raspbian)
- DS18B20 1-Wire digital temperature sensor
- 4.7Kohm resistor
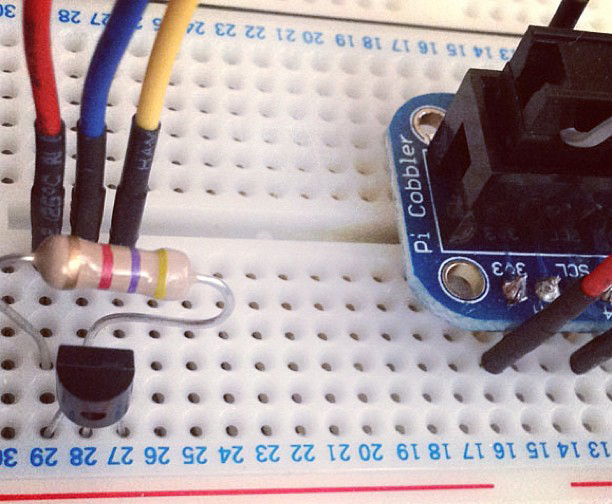
- A breadboard and adafruit or similar breakout board (or breadboard and some jumper leads)
For one of my first Raspberry Pi projects I was looking for a way of measuring the temperature of a room and making that available via a web feed (which will be a follow up post). I was recommended the DS18B20 1-Wire digital temperature sensor, so I ordered one on Amazon for a few pounds. I already had some spare 4.7Kohm resistors laying around.
First update and upgrade your version of Raspbian (this may take a little while!)
sudo aptitude update
sudo aptitude upgrade
Run the following commands to register the new sensor we’re going to connect, and add temperature support
sudo modprobe w1-gpio
sudo modprobe w1-therm
Now set up the circuit as follows:
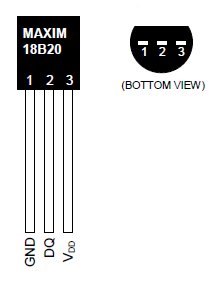
- Connect the 3.3v output (pin 1 of the Pi) to pin 3 of the sensor.
- The GPIO#4 (pin 4 of the Pi) is connected to the data output (pin 2) of the sensor.
- Finally the GND (pin 6 of the Pi) needs to be connected to pin1 of the sensor.
- Insert the 4.7kΩ resistor between pin 2 and pin 3 of the temperature sensor.
This should have set up the Pi to report temperature readings via GPIO4. To find out the available device, issue the following commands
cd /sys/bus/w1/devices
ls
These will be 1-wire devices associated with the Pi.
cd 28-000003b74282
cat w1_slave
There will either be a YES or NO as the end of the first line. If it’s a NO, then cat the file again, as this indicates it isn’t a valid temperature reading. If it’s YES, then the end of the second line should look something like it does above, with the t=27312 indicating the temperature in degrees celsius multiplied by 1000.
37 00 4b 46 ff ff 07 10 1e : crc=1e YES

37 00 4b 46 ff ff 07 10 1e t=27312